

Igår morse var jag på nagelkurs hos svenska nagellacksmärket Scratch nails. Kursen höll för en liten skara bloggare, bland annat var härliga P'ssion-Emelie, Beleza-Tina och TotalBeauty-Carina på plats, i Scratch nails lokaler i Stockholm.
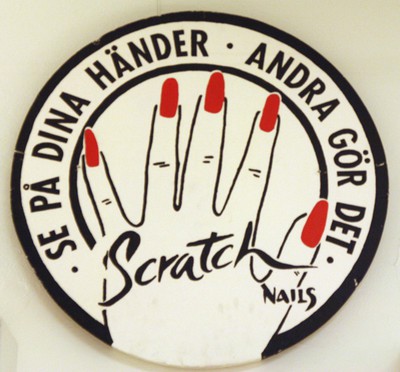
Förmiddagen startade med en smaskig frukostbuffé, och sen berättade Scratch nails VD och grundare Marie Houston lite mer om märket och dess historia.

Tea, fruit salad with yoghurt and croassaints - yum!
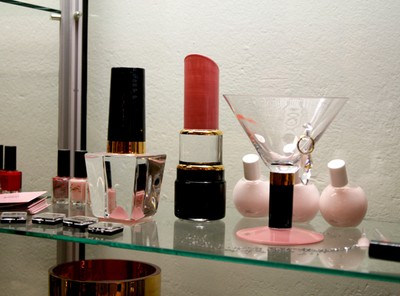
All Scratch nails shades are personally picked by Marie
1985 öppnade den första Scratch nails-salongen i Stockholm, och 1992 utvecklade de sina första egna nagellack - redan då fria från toulene, DBP och formaldehyd (3-free). Numera finns Scratch nails vårdande nagelsortiment representerat i 55 Åhlénsbutiker runt om i Sverige, och de färgade lacken finns att köpa på salonger samt via deras webshop.
Själva kursen leddes av Scratch nails utbildningsansvarige, Lina Nyberg, som introducerade oss till receptet till en lyckad hemmamanikyr med hjälp av Scratch nails basmanikyrkit. Kitet innehåller en crystal stone nagelfil, en nagelpolerare, aceton-och oljefri nagellacksremover, nageloljan nail food samt ett ofärgat lack.
Precis som med hudvård så är nyckeln till fina och friska naglar en god nagelvård med peeling och återfuktning. Det är lite pyssel, men är enkelt att göra hemma i några få enkla steg och tar inte så lång tid som man kan tro.
Precis som med hudvård så är nyckeln till fina och friska naglar en god nagelvård med peeling och återfuktning. Det är lite pyssel, men är enkelt att göra hemma i några få enkla steg och tar inte så lång tid som man kan tro.

Manikyr kit bas (395 SEK)

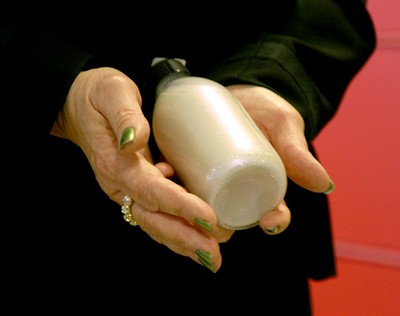
1. Första steget i en manikyr är att ta bort gammalt lack med remover, helst utan aceton och olja. Aceton är ett väldigt starkt lösningsmedel som torkar ut och sliter på naglarna, och har man olja i removern så kapslar det in lösningsmedel mot nageln vilket sliter och kan ge missfärgade naglar. Remover och olja för sig, med andra ord!
2. Forma och försegla nagelns kant med hjälp av en finkornig fil, gärna i glas eller kristall då dessa slipar nageln istället för att slita ner den som en sandpappersfil gör, och de håller i princip för evigt. Med en finkornig fil kan du även fila ner små förhårdnader runt nageln och på fingrarna utan att skada huden.
3. En nagelpolerare jämnar ut nagelytan, ger glans och ger en bra bas för ditt nagellack att fästa på. En nagelpolerare består ofta av 3 sidor - 1 för att jämna ut nagelytan (används max 3 ggr/år!), och 2 för att polera fram en glans på nageln.
4. Dags för nagelolja! Precis som huden så behöver nageln fukt för att behålla sin naturliga spänst och elasticitet. En nagelolja håller dessutom dina nagelband återfuktade. Skillnaden mellan en nagelolja och t.ex. en matolja är att nageloljan har mindre molekyler och tränger därmed lättare ner i nagelns undre skikt. 1-2 droppar per hand räcker gott och väl till alla 5 naglar, och oljan kan med fördel poleras in i nageln med hjälp av det näst sista steget på din polerfil.
5. Lackningsdags! Grunda med ett underlack som passar dina behov - det finns underlack för naglar som är för mjuka, hårda, fårade, gulnade.... You name it! Ett underlack fungerar som ett klister mellan nageln och det färgade lacket och känns lite "strävt" efter det har torkat. Lacka sedan önskat antal lager med ditt färgade lack. Lacka med så få drag med penseln som möjligt för att få ett så jämnt resultat som möjligt - det gör inte så mycket om första lagret lack blir lite flammigt, det jämnar ut sig i nästa lager. Avsluta med topplack för extra glans och att skydda färgen mot att mattas ner eller repas.

Lina talks about different base products for the nails
In English: Yesterday, I attended a nail course at Swedish nail polish brand Scratch nails. The course was held at Scratch nails in Stockholm for a selected crowd of beauty bloggers.
The morning started out with a yummy breakfast buffet, and then Scratch nails' CEO and founder Marie Houston told us a bit more about the brand and their history.
The first Scratch nails salon opened in 1985 in Stockholm, and in 1992 they developed their first own nail polishes - already then free from toulene, DBP and formaldehyde (3-free). Today, Scratch nails nourishing nail range is available at over 50 Swedish department stores, and the coloured polishes are available at salons and online.
The course was led by Scratch nails' educational manager, Lina Nyberg, who introduced us to the recepie for a successful at-home manicure usint the Scratch nails base manicure kit. The kit contains a crystal stone nail file, a nail polisher, an acetone and oil free polish remover, the nail oil nail food plus a clear polish.
Just as with skincare, the key to gorgeous and healty nails is good nail care with peeling and moisture. It's a bit of a process, but it's easy to do at home in a few easy steps and doesn't take as long as you might think.
1. The first step in a manicure is to remove old polish with a remover, preferrably free from acetone and oil. Acetone is a strong solvent that dries and damages the nails, and if there's oil in the remover, it encapsulates the solvant against the nail which damages the nail and can discolour the nails. Remover and oil should be applied separately, in other words!
2. Shape and seal the nail's edge with a fine nail file, preferrably a glass or crystal one since these grinds the nails instead of tearing it down like a sandpaper file does, and they will last you basically forever. With a fine nail file, you can also file small calluses around the nail and on the fingers without damaging the skin.
3. A nail polisher evens out the nail surface, provides shine and gives a good base for your polish to grip onto. A nail polisher often consists of 3 sides - 1 to even out the nail surface (do not use more than 3 times/year), and 2 to polish a shine to the nail.
4. Time for nail oil! Just as the skin, the nail needs moisture to keep its natural flexibility and elasticy. A nail oil will also keep your cuticles moisturised. The difference between a nail oil and a regular oil, like olive oil, is that the nail oil has got smaller molecules and will penetrate the nail into the bottom layers. 1-2 drops per hand is enough for all 5 nails, and the oil can be polished into the nail using the next to last step on your nail polisher.
5. Polish time! Apply a base coat suited for your needs - there are base coats for nails that are too soft, hard, ridged, yellow... You name it! A base coat works like a glue between the nail and your coloured polish and feels a bit "rough" after it has dried. Then, follow up with your desired ammount of layers of your coloured polish. Do as few strokes as possible with the brush to get an even result - it doesn't matter that much if the first layer is a bit uneven, the second layer will even that out. Finish with a top coat to provide extra shine and protect the colour to become dull or scratched.
Martine
Jag måste verkligen skaffa ett underlack då jag inte har något. Vad skulle du rekommendera för underlack om man har tunna och mjuka naglar?
Purity
Martine: Jag skulle råda dig att skaffa ett stärkande och återfuktande underlack. Ett underlack som enbart stärker kan göra naglarna för "stumma" och hårda och då går dom av. De flesta salongsmärken har stärkande underlack i sitt sortiment - några exempel är OPI Natural nail strengthener, CND toughen up, Scratch nails no soft nail och China Glaze nail strengthener & growth formula.
2